Developing your first Spring Boot application is quite easy. As we know Spring Boot makes it easy to create stand-alone, production-grade Spring based Applications that you can "just run". Its basically to minimize the configuration.


In this example I have used below frameworks and tools for this example.
1. Maven 3.3.9
2. JDK 1.8
3. Eclipse IDE
4. spring-boot dependency
First step - In eclipse create a maven project "hello-world-spring-boot" as below .
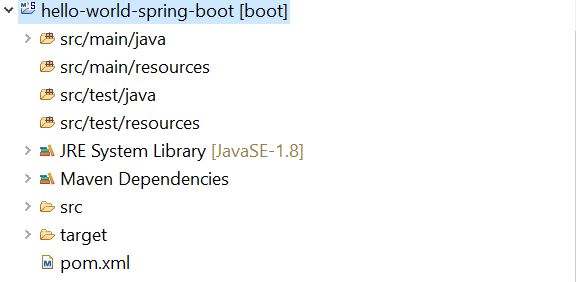
Then add the dependency for spring-boot and plug-in in the pom.xml file.
Pom.xml
<project xmlns="http://maven.apache.org/POM/4.0.0" xmlns:xsi="http://www.w3.org/2001/XMLSchema-instance"
xsi:schemaLocation="http://maven.apache.org/POM/4.0.0 http://maven.apache.org/xsd/maven-4.0.0.xsd">
<modelVersion>4.0.0</modelVersion>
<groupId>com.javadevelopersguide.www</groupId>
<artifactId>hello-world-spring-boot</artifactId>
<version>0.0.1-SNAPSHOT</version>
<description>This is a hello world example with Spring Boot.</description>
<parent>
<groupId>org.springframework.boot</groupId>
<artifactId>spring-boot-starter-parent</artifactId>
<version>1.5.10.RELEASE</version>
</parent>
<dependencies>
<dependency> <groupId>org.springframework.boot</groupId> <artifactId>spring-boot-starter-web</artifactId> </dependency> </dependencies>
<properties>
<java.version>1.8</java.version>
</properties>
<build>
<plugins>
<plugin>
<groupId>org.springframework.boot</groupId>
<artifactId>spring-boot-maven-plugin</artifactId>
</plugin>
</plugins>
</build>
</project>
Then create a controller class "HelloWorldController" with a rest api method sayHello()
HelloWorldController.java
package com.techbyteslearn.springboot.example;
import org.springframework.boot.autoconfigure.EnableAutoConfiguration;
import org.springframework.stereotype.Controller;
import org.springframework.web.bind.annotation.RequestMapping;
import org.springframework.web.bind.annotation.ResponseBody;
@Controller
@EnableAutoConfiguration
public class HelloWorldController {
@RequestMapping("/hello")
@ResponseBody
public String sayHello() {
return "Hello World Developer!!!";
}
}
I have use below annotations in my controller. Here in this example the uri path is /hello
@Controller - This is used to specify the controller , as its spring framework basic.
@EnableAutoConfiguration - This enable auto configuration for Application Context.
@RequestMapping - This is used to map to spring mvc controller method.
@ResponseBody - Used to bind http response body with a domain object in return type.Its behind the scenes.
Now , my controller is ready.Just I need a luncher , who can lunch my spring boot application. I have created a "SpringBootApplicationLuncher".
SpringBootApplicationLuncher.java
package com.techbyteslearn.springboot.example;
import org.springframework.boot.SpringApplication;
public class SpringBootApplicationLuncher {
public static void main(String[] args) {
SpringApplication.run(HelloWorldController.class, args);
}
}
Now you can run this launcher to start the spring boot application.Then, you can see the below screenshot showing the tomcat is started. As you know spring-boot is embedded with tomcat feature.

Now , your application is up and running . I have highlighted above that the tomcat is started on default port 8080.
Try this tomcat URL, which is running now :- http://localhost:8080/hello

Alternatively , Also you can also start your spring-boot application on command line (Terminal). I have used windows OS.
You can use the below Maven Command to build and run this spring-boot application :-
1. Build the application :- mvn clean install

2. Run the application :- mvn spring-boot:run


Now the service is running on tomcat port 8080 .Use the below URL to access the sayHello() api.
http://localhost:8080/hello


